There are many key components to a successful website. We all know that navigation should be simple and clean, contact info should be prominently displayed, and that sites should work well on desktop computers, phones, and tablets. One thing that people often overlook is their use of images throughout their site.
According to the Nielsen Group, the majority of users will decide if they want to stay on your website within the first 10-20 seconds of viewing. No matter how well-written your content is, you are unlikely to keep the attention of your users without compelling visual elements. Fortunately, there are solutions that fit every type of website and budget.
Hiring a Photographer
This is the easiest but often most expensive way to get high-quality photographs for your website.
Benefits:
In addition to having high-end equipment and training, a photographer might also have a vision for your photos beyond what you were originally planning. Photographers often bring fresh eyes to a project and can provide new ideas to better photograph your products, services, or locations. Presumably, they will also produce consistent results and ensure you’re getting a quality batch of photos to use on your site.
Disadvantages:
The biggest disadvantage of using a professional photographer is the cost associated with hiring them. Like any other service, photographers are trained craftsmen who spend thousands of dollars on equipment, software, and training to keep up with their profession. As with any other service, it is prudent to research local photographers to make sure they excel in shooting the kind of images you need.
Using Stock Photos
Leveraging stock photos can save you money versus hiring your own photographer, but you can also set up unrealistic expectations of your business by showing them.
Popular stock photography agencies include iStock, Shutterstock, and Adobe Stock.
Benefits:
Stock photos have a mixed reputation, but can help businesses implement high-quality photography at a relatively low price. Given the sheer number of stock photographers and stock agencies available, you can likely find stock photos that fit both your budget and needs, no matter how specific your requirements are.
Disadvantages:
When picking stock photos, it is critical to use images that align with your business to avoid giving customers unrealistic expectations of your products or services. For example, if you run a small massage studio you shouldn’t use a stock photo of a large, hotel-style spa. Also, if you start shopping for competitively-priced stock photos you can expect to see those same images all over the web. Using these popular images might look impressive, but it could also make your sight appear generic and somewhat forgettable. Before deciding on a purchase check out the competition to ensure they aren’t already using the same images.
Do It Yourself
If you’re on an extremely tight budget you may have a need to create images yourself. Fortunately, most of us have cameras on us at all times; leading smartphones such as the Apple iPhone and Samsung Galaxy can take great photos under the right conditions.
Benefits:
Like all other DIY projects, the benefits are going to be saving money and working on your own schedule.
Disadvantages:
Like all other DIY projects, the disadvantage is that you might not have a clue what you are doing.
Taking a picture is easy. Creating a compelling image can be a real challenge though. If you want to try to give it a shot, here are some pointers to help you out.
Cameras:
While you will get the best results with a DSLR camera or an advanced point-and-shoot, you can still get very usable images from a lot of different devices, including higher end smart phones. Since you are specifically looking to make web images, you can safely ignore specifications such as megapixels. Even a 2 megapixel camera could produce images suitable for web use since the average user’s resolution probably won’t exceed 2000 pixels in width.
Lighting:
Lighting is what will make or break any photograph and there are several mistakes people consistently make that are easy to correct.
Time of Day: If you’re shooting outside, try to do so either just after sunrise or leading up to sunset. This creates softer, more directional light versus harsh daylight.
Even Lighting: Look for areas that have even lighting throughout. Using a completely shaded area on a sunny day can make for great portraits, but make sure you’re lighting is the same from the foreground to the background. If your subject is completely shaded, but sun streaks are lighting up the area behind them, it will make for a very distracting, bright background. It’s important to remember that your camera isn’t nearly as sophisticated as your eyes and has a harder time balancing the light.
Light Temperatures: Every type of light puts off a different color temperature, meaning it might have a blur or yellow hue to it. If you are taking photos in one type of light, like daylight for example, your camera can compensate for it and produce accurate color. If you are shooting in an office you might have fluorescent lights and window light hitting your subject at the same time. In this instance the camera won’t really know which one to adjust to and you will likely end up with discolored photos that require extensive editing. The easiest way to avoid this is to try to eliminate competing light sources will taking pictures.
Window Light: Some of the best food photographers rely on window light as their primary source of light for a photo. This is because the light from a window (preferably northern or southern) provides, soft, indirect light at almost any time of day. You’d be surprised what you can do with some white paper and a nice, big window for a simple product shot.
Composition
In addition to lighting, how you compose your photo can go a long way towards making an interesting photo.
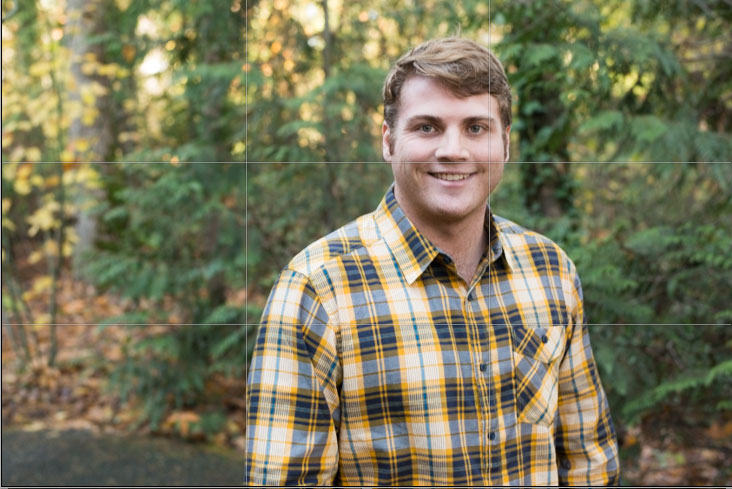
Rule of Thirds: This is probably the most well-known principle when it comes to composing a photo and it is a great way to get away from portraits that look like mugshots. When you’re framing your photo in your camera’s viewfinder, imagine that there is a grid that turns your photo into three columns and three rows. The four spots where the lines intersect are where you would want to place your subject to create a more interesting composition.

For more information and examples, check out this link from Digital Photography School.
Leave Extra Room: This isn’t so much a rule of composition, but a way to help you out later. If you get too close to your subject without leaving any space around it, the resulting image may not fit where you anticipated. If you leave room around it, you can always crop the image to fit your needs.
Focus & Sharpness
Your photos should always be in focus and sharp so that whether they are viewed as thumbnails or full screen images, they are nice and clear.
Focus: Keeping your subject in focus when it is stationary or relatively slow is more a matter of paying attention to where your camera is focusing and adjusting as-needed.
Sharpness & Avoiding Blurred Photos: Blurry photos are usually caused by your hands moving and/or a lack of light. The less light the camera is given, the longer it needs to keep its shutter open to get a proper exposure. If you are shooting by hand in this situation you will likely end up with a blurry photo. If you do find yourself shooting in low light scenarios, a tripod can help keep your images sharp my stabilizing your camera.
Photographers take years learning the nuances of lighting, composition, focus, and many other aspects of their craft. While this one article won’t make you an expert, it can hopefully get you going in the right direction to create more compelling imagery for your website.

Logical Position, an Inc. 500 digital agency supporting 5,000+ clients across North America. LP is the proud recipient of Google’s Lead Generation Premier Partner of the Year and Microsoft's Global Channel Partner of the Year 2024! The award-winning agency offers full-service PPC management, SEO, Paid Social, Amazon and Creative Services for businesses large and small. As a Google Premier Partner, Microsoft Elite Partner & Meta Business Partner, LP is in the top 1% of ad spend managed across platforms.

